
computer
Clean the inside to remove dust around the fan. Prevents PC malfunctions!
Bring it to the store お預かり期間の目安:約 7日間 computer 通常価格 5,720円(1台 / 税込) 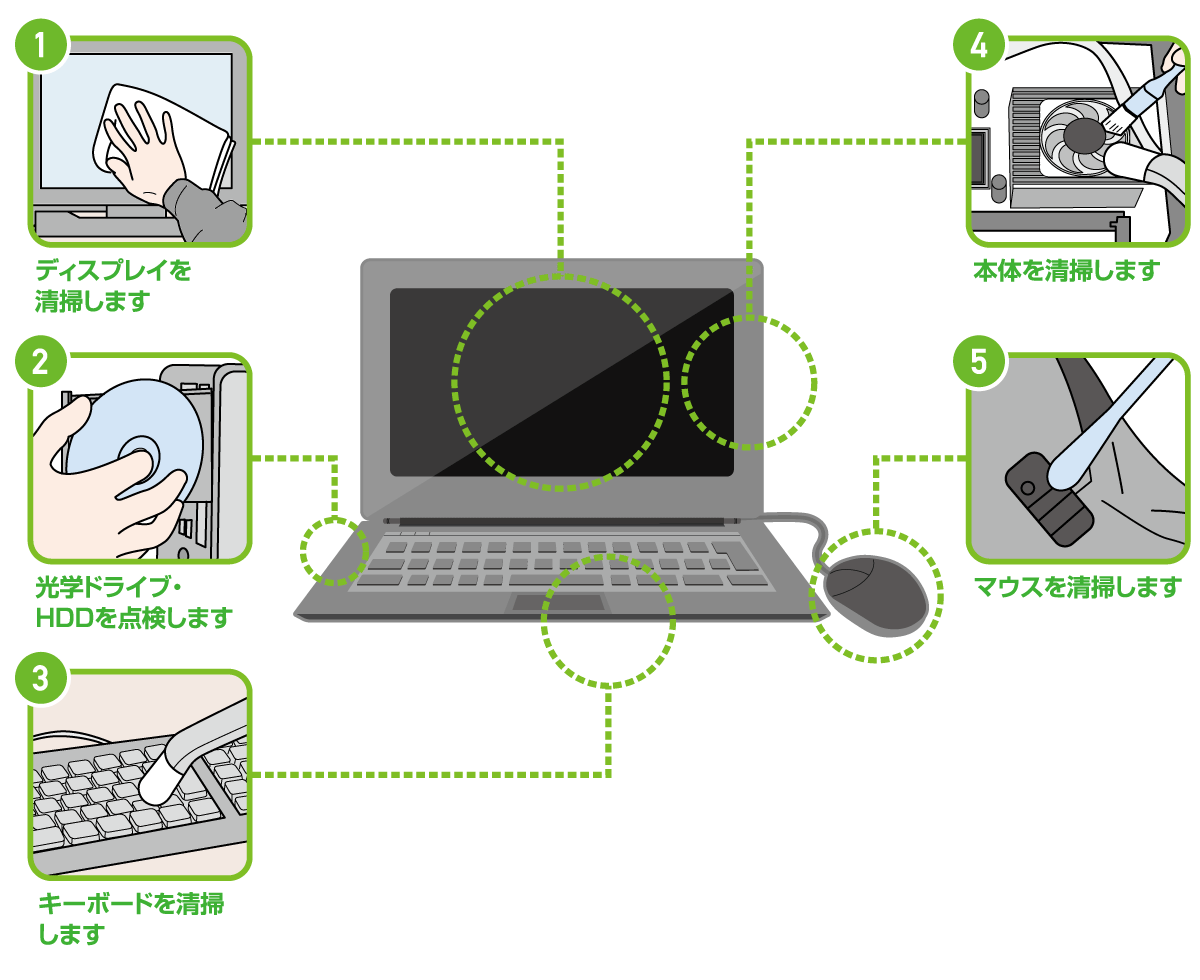
① ディスプレイの清掃
Cleanly removes fingerprints and oil film stains on the display surface. For LCD displays, use a special cleaning kit to gently remove dirt.
② 光学ドライブ・HDD の点検
Use the dedicated software to test whether the optical drive reads the disk normally and whether the hard disk is defective.
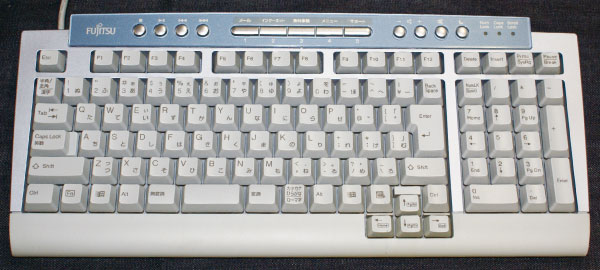
③ キーボードの清掃
クリーナーでキーボードのすき間に詰まった、取りにくいホコリなどを吸引します。
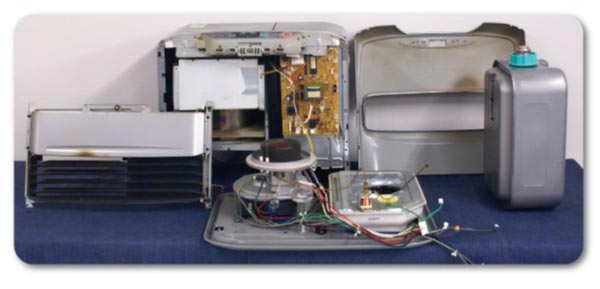
④ 本体の清掃
本体を分解後、動作不良の原因になるメインボードや CPU ファン回りのホコリをハケで取り除きます。外装部のホコリや油汚れも拭き取り、すみずみまでキレイにします。
⑤ マウスの清掃
Gently remove dirt from the laser sensor, which is the key to mouse operation, with a cotton swab soaked in cleaning liquid. Wipe off any dirt on the exterior or cord with a towel.
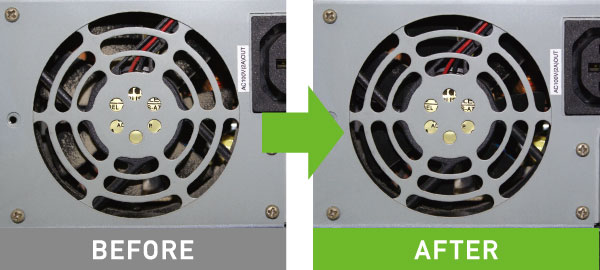
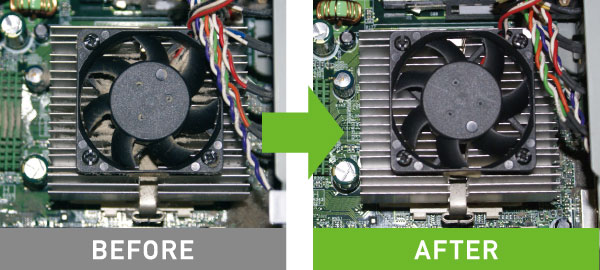
The difference is clear before and after cleaning! So beautiful with professional technology!
Clean up dust from the power supply unit cooling fan!
| ホコリまみれの CPU ファン回りがキレイに!
|
|---|---|
Clean the LCD monitor with a cleaning kit!
| キートップを 1つひとつ取り外して清掃!
|
Fan
Check the condition of the motor and fan and remove the accumulated dust. Prevents fan failure!
Bring it to the store お預かり期間の目安:約 7日間 Fan 通常価格 2,640円(1台 / 税込) 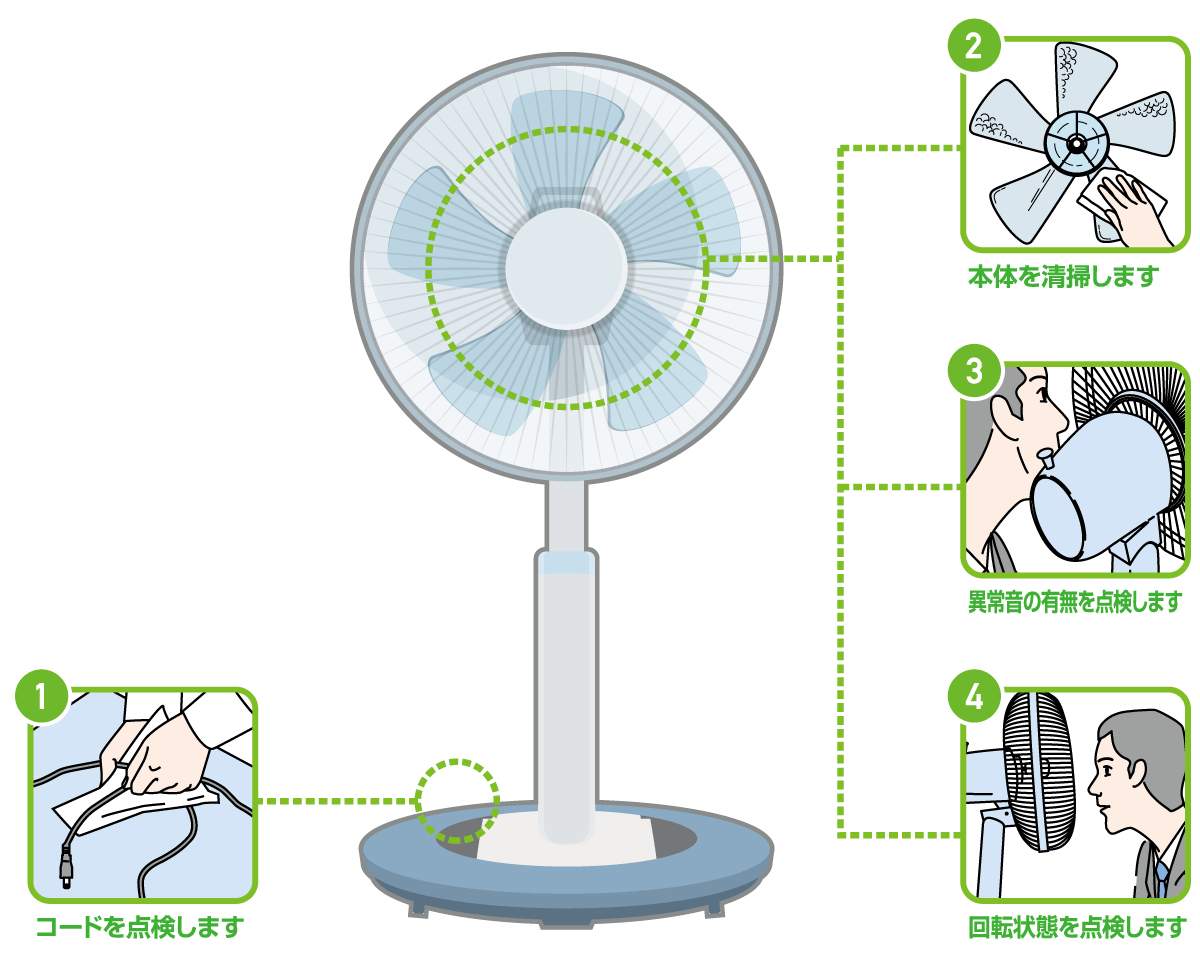
① コードの点検
Make sure the cord is not broken or damaged, and then carefully remove the dirt with a towel.
② 本体の清掃
After removing the dirt stuck to the groove with a spatula, clean it with a special cleaning agent.
③ 異常音の点検
After a trial run, check if there is any abnormal noise or vibration from the motor.
④ 回転状態の点検
After a trial run, check if the fan is rotating normally.
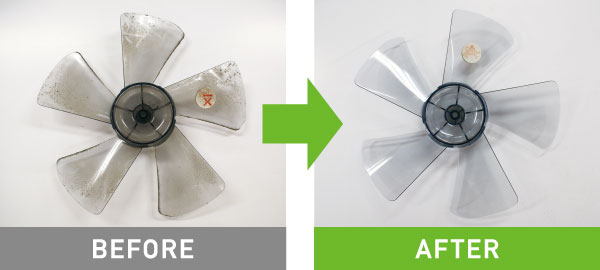
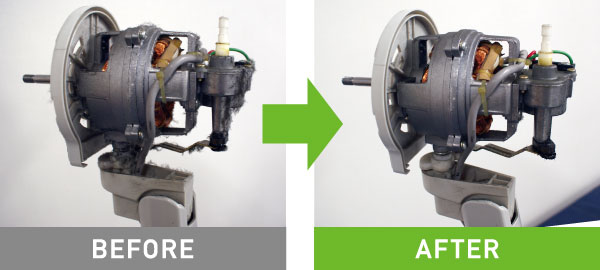
The difference is clear before and after cleaning! So beautiful with professional technology!
Remove the sticky dust and make it as good as new!
| Clean the dust that collects in the gaps of the motor!
|
|---|
Kotatsu (heater unit)
Check the operation of the controller and remove the dust accumulated on the fan. Prevents kotatsu breakdown!
Bring it to the store お預かり期間の目安:約 7日間 Kotatsu (heater unit) 通常価格 2,640円(1台 / 税込) 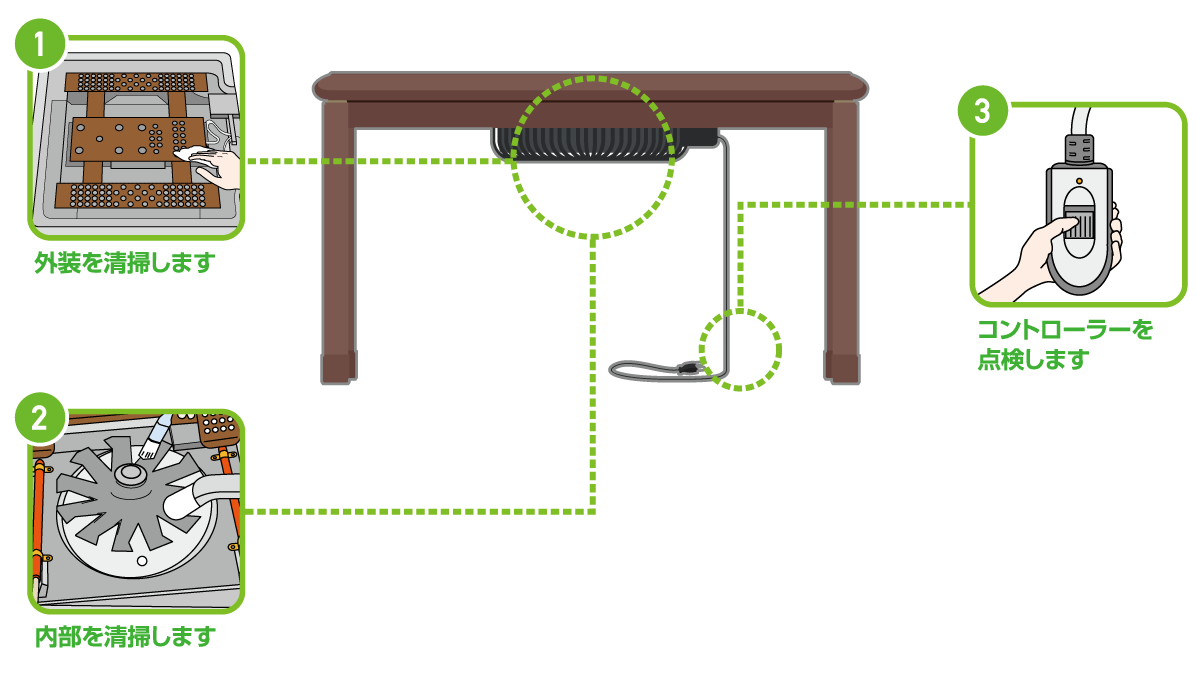
① 外装の清掃
Wipe off dirt with a towel with special wax.
② 内部の清掃
Use a brush and a cleaner to cleanly remove the dust that has accumulated in the heater. Carefully clean the heater, paying attention to damage.
③ コントローラーの点検
電源の ON/OFF やタイマー機能が正常に働くか、などコントローラーの動作確認を行います。
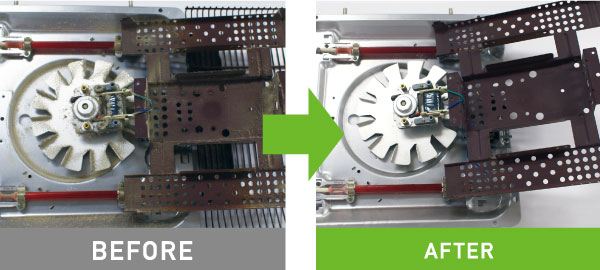
The difference is clear before and after cleaning! So beautiful with professional technology!
Removes all dust accumulated on the back side of the exterior and the fan!
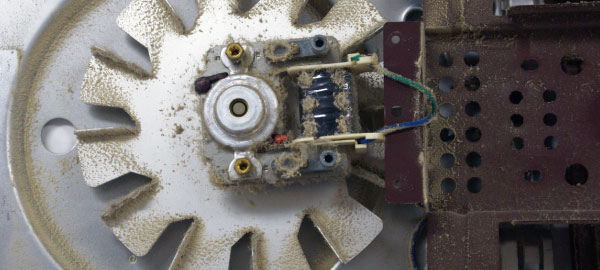
| In the case of the fan type, it is difficult to suck the dust in the futon ...
|
|---|
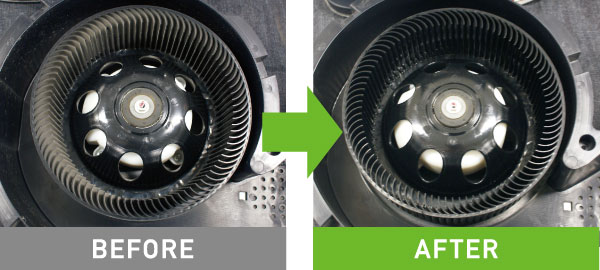
Air cleaner
Inspect internal parts and filters to remove accumulated dust. Restores the cleaning ability of the air purifier!
Bring it to the store お預かり期間の目安:約 7日間 air purifier 通常価格 11,000円(1台 / 税込) 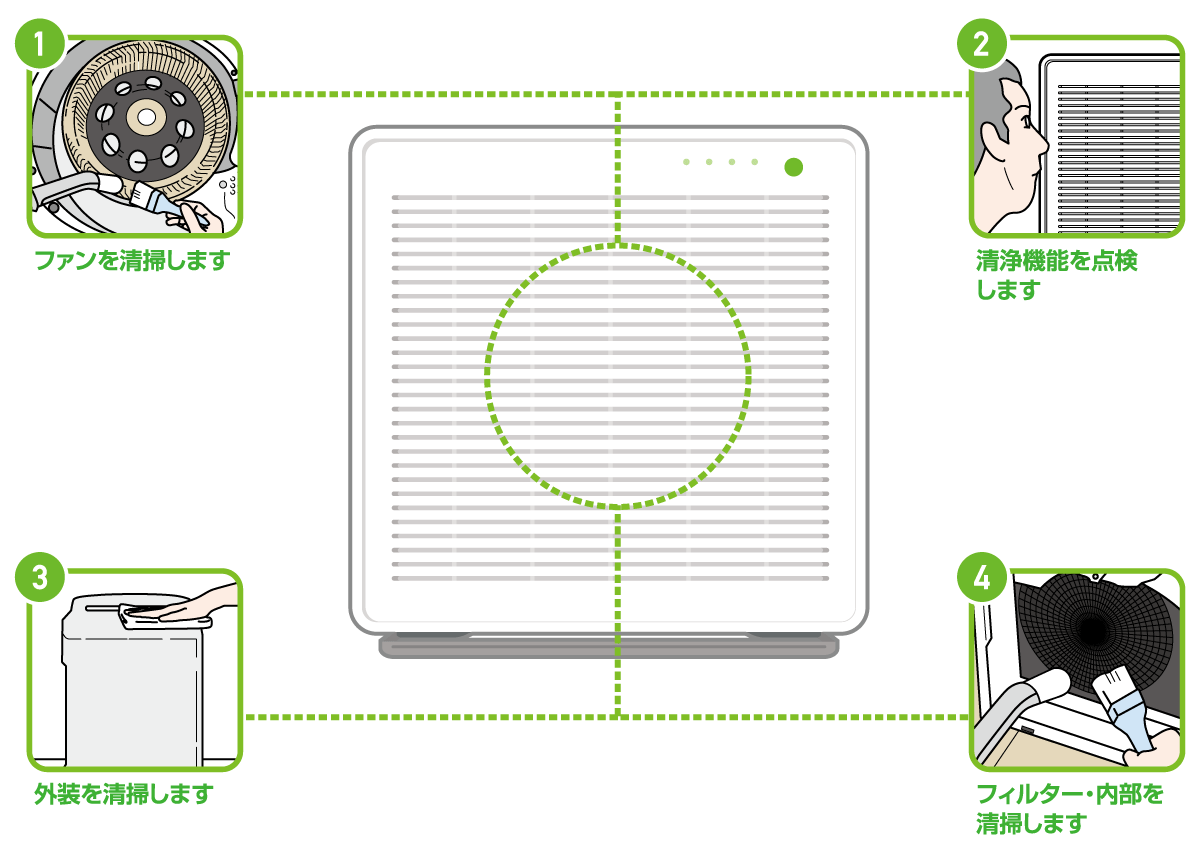
① ファンの清掃
Remove the fan and carefully remove the dust with a brush and cleaner.
② 清浄機能の点検
After a trial run, check if the air can be sucked and purified normally.
③ 外装の清掃
Thoroughly polish off dirt on the exterior with a cloth with special wax.
④ フィルター・内部の清掃
Dust adhering to the filter and internal parts is carefully removed with a brush, and all is sucked with a cleaner. For products with a humidifying function, also clean the humidifying tank and filter.
The difference is clear before and after cleaning! So beautiful with professional technology!
Clean up dust in the fan gap!
| Disassemble and wipe out the dust that has accumulated inside!
|
|---|
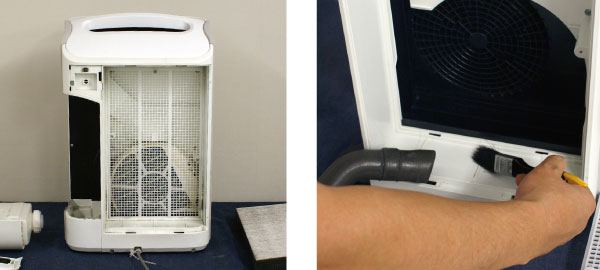
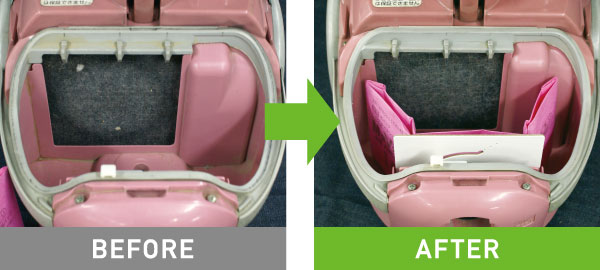
Vacuum cleaner
Inspect hoses and motors to clear filter clogging. Restores the suction capacity of the vacuum cleaner!
Bring it to the store お預かり期間の目安:約 7日間 Vacuum cleaner 通常価格 4,400円(1台 / 税込) 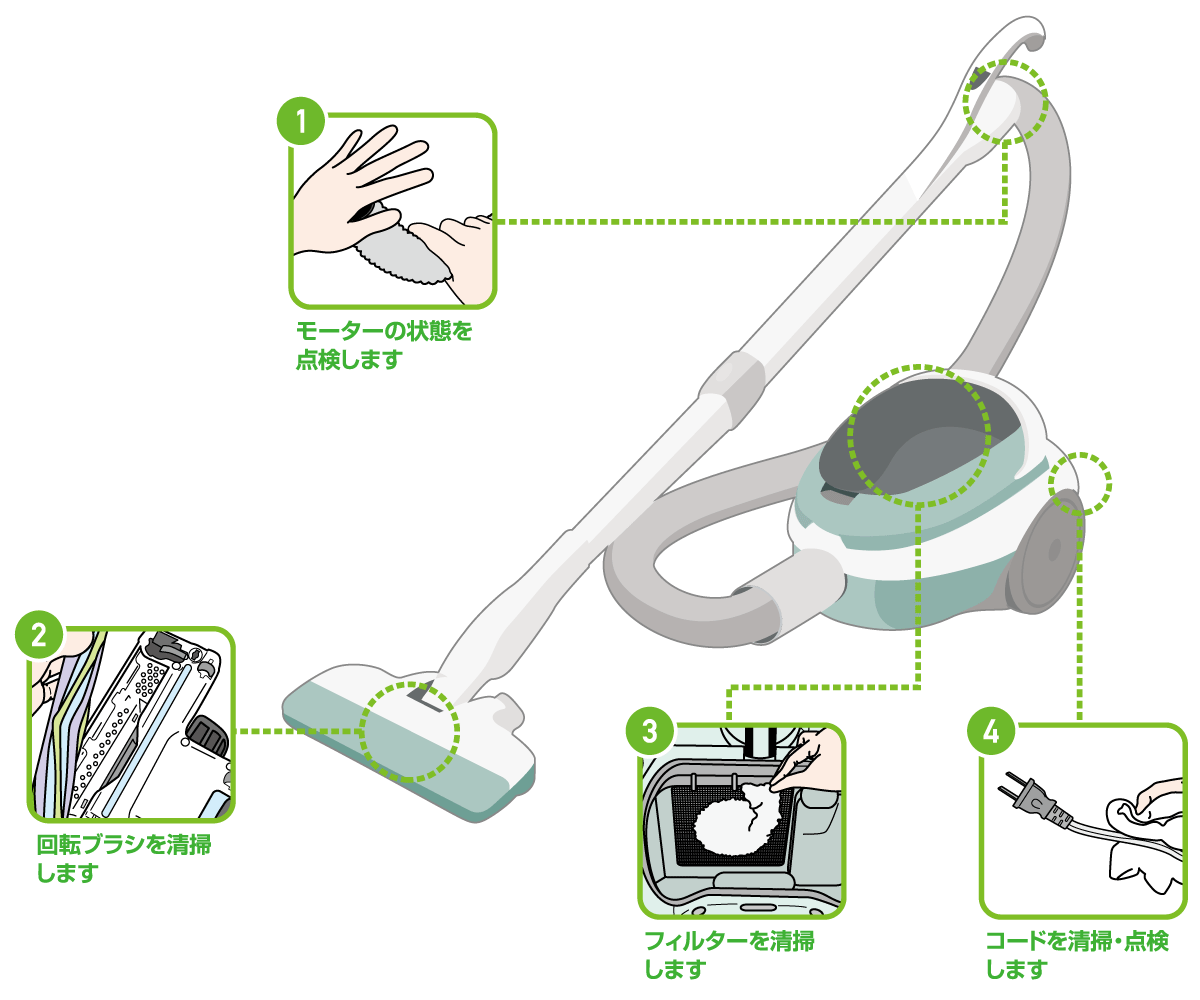
① モーター・ホースの点検
Check the suction capacity by closing the tip of the hose with your hand. Also check the operating noise of the motor to see if there are any abnormalities or if there is any foreign matter inside the hose.
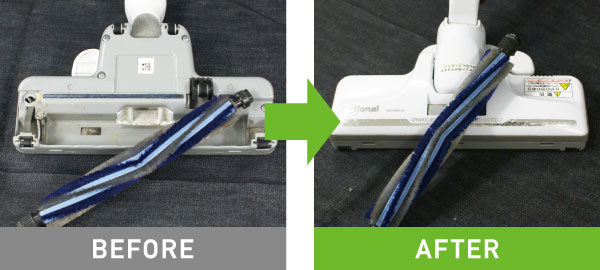
② 回転ブラシの清掃
Remove the rotating brush from the nozzle and carefully remove the hair and dust that cause the decrease in rotational force by hand.
③ フィルターの清掃
フィルターの目に詰まったホコリを手作業で丁寧に除去。下がった吸引力を回復させます。フィルターが 2枚以上ある場合は、すべて清掃します。
④ コードの清掃・点検
AC プラグの先端に異常がないか確認した上で、コードの汚れをタオルで拭き取ります。
The difference is clear before and after cleaning! So beautiful with professional technology!
Removes all dust stuck in your eyes!
| Clean up hair and dust stuck in the rotating brush!
|
|---|
Oil fan heater
Check the condition of the combustion part and remove darkening and soot stains. Improves mid-digestion of fan heaters!
Bring it to the store お預かり期間の目安:約 7日間 Oil fan heater 通常価格 4,620円(1台 / 税込) 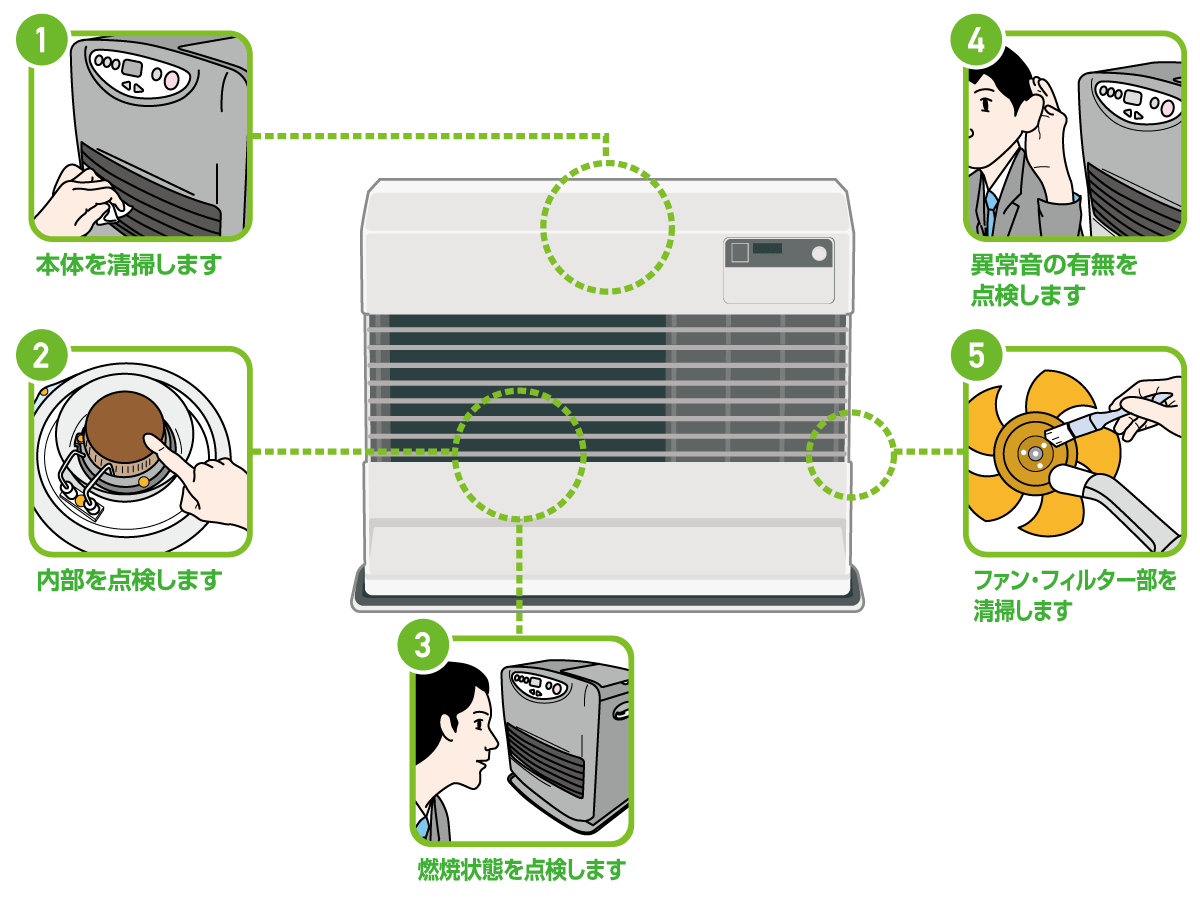
① 本体の清掃
Wipe off dirt on the exterior with a special wax on the towel. After disassembling the dust that has accumulated inside, remove it with a brush and cleaner.
② 内部の点検
Check that the burning part has soot or darkening, and if it is dirty, remove it cleanly.
③ 燃焼状態の点検
After a trial run, check if it burns normally. After the test run, kerosene is drained and the inspection is completed.
④ 異常音の点検
After a trial run, check if there is any abnormal noise from the motor.
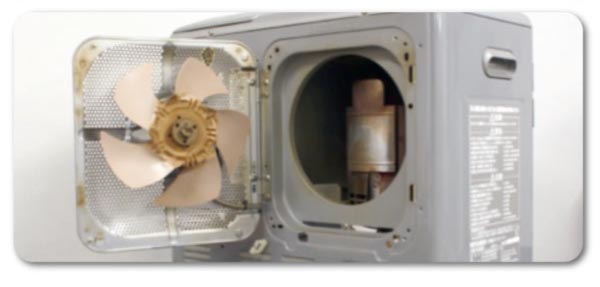
⑤ ファン・フィルター部の清掃
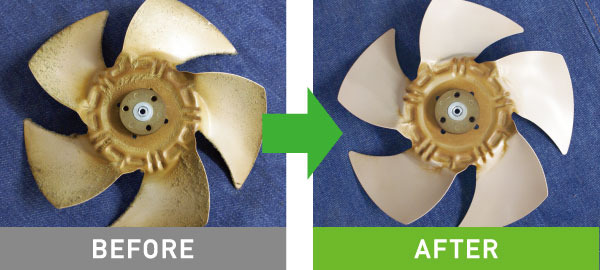
Disassemble the inside and remove the blower fan and air supply filter. Remove the attached dust with a brush and a cleaner. If the fan is very dirty, wash it off with water.
The difference is clear before and after cleaning! So beautiful with professional technology!
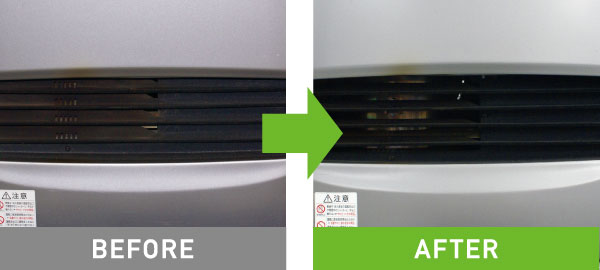
The hot air blowout grill part is shiny!
| Removes all dust that causes digestion on the way!
|
|---|---|
Thoroughly remove the dust that has accumulated inside after disassembling!
| The inside of the blower fan guard shelter is also clean!
|
Kerosine stove
After checking the condition of the automatic ignition device, clean the reflector and burn the core. Restores the heating capacity of kerosene heaters!
Bring it to the store お預かり期間の目安:約 7日間 Kerosine stove 通常価格 3,300円(1台 / 税込) 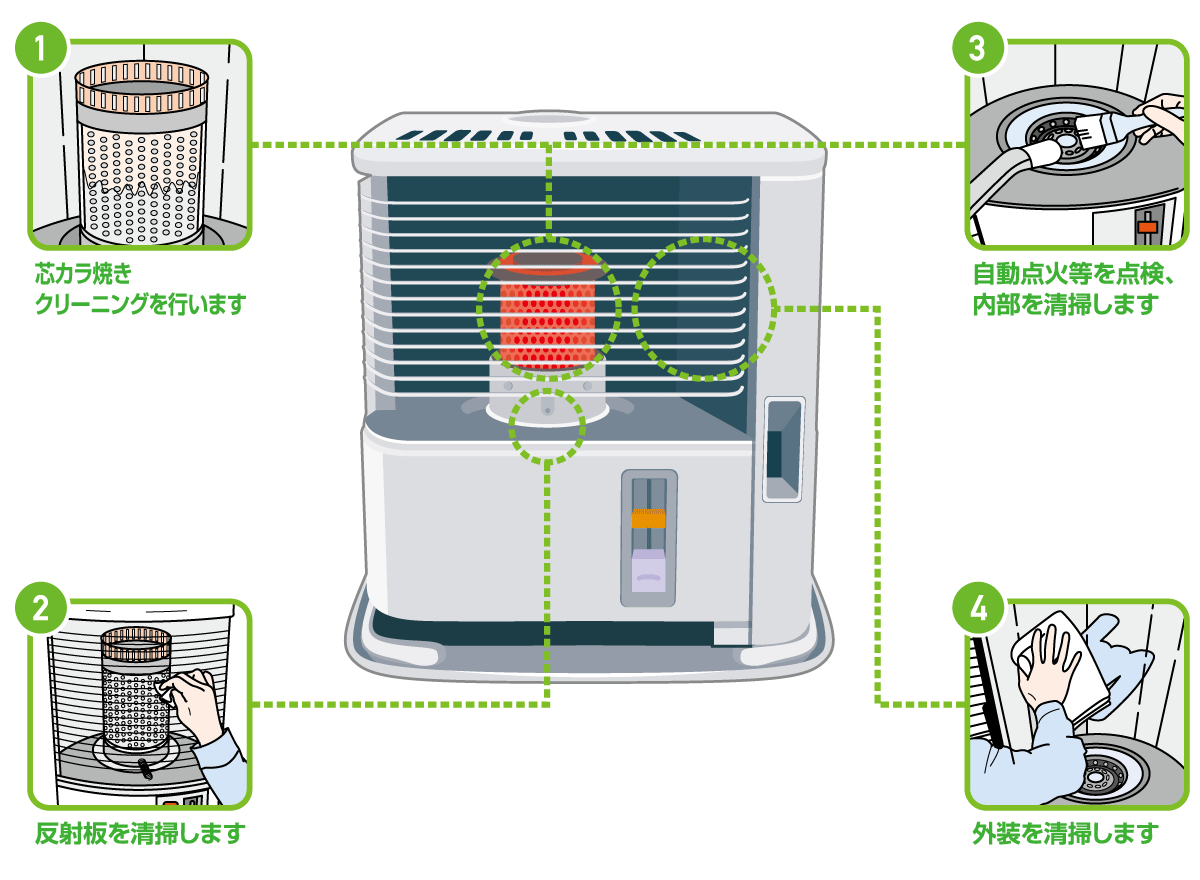
① 芯カラ焼きクリーニング
After removing kerosene, roast it. Burns off tar adhering to the core, which causes bad odors and insufficient heat.
② 反射板の清掃
Remove dust and dirt adhering to the reflector with a cleaner or special wax. Prevents a decrease in thermal efficiency.
③ 自動点火等の点検・内部の清掃
Use a cleaner and a brush to remove the dust that has accumulated inside. Also check if the ignition heater can ignite properly.
④ 外装の清掃
Wipe off dust and oil stains on the exterior with a towel with special wax. Carefully polish until shiny.
引取・宅配もOK! 引取料金 2,200円(税込)/ 宅配料金 1,100円(税込)
当社でお買い上げでない家電もOK! ※当社指定エリアに限ります。詳しくは店頭にてご確認ください。
Apply at the store | Please be sure to check ・ 表記の金額は 1台に対する料金です。 |